

You write your posts on TravelFeed. The Site Builder is where you change how your blog looks and what its pages show.
Open the Site Builder
In your dashboard, open Hosting and click Open Site Builder. The Site Builder opens in a new tab. The link works once and expires after a couple of minutes. If you see "This link has expired", click Open Site Builder again.
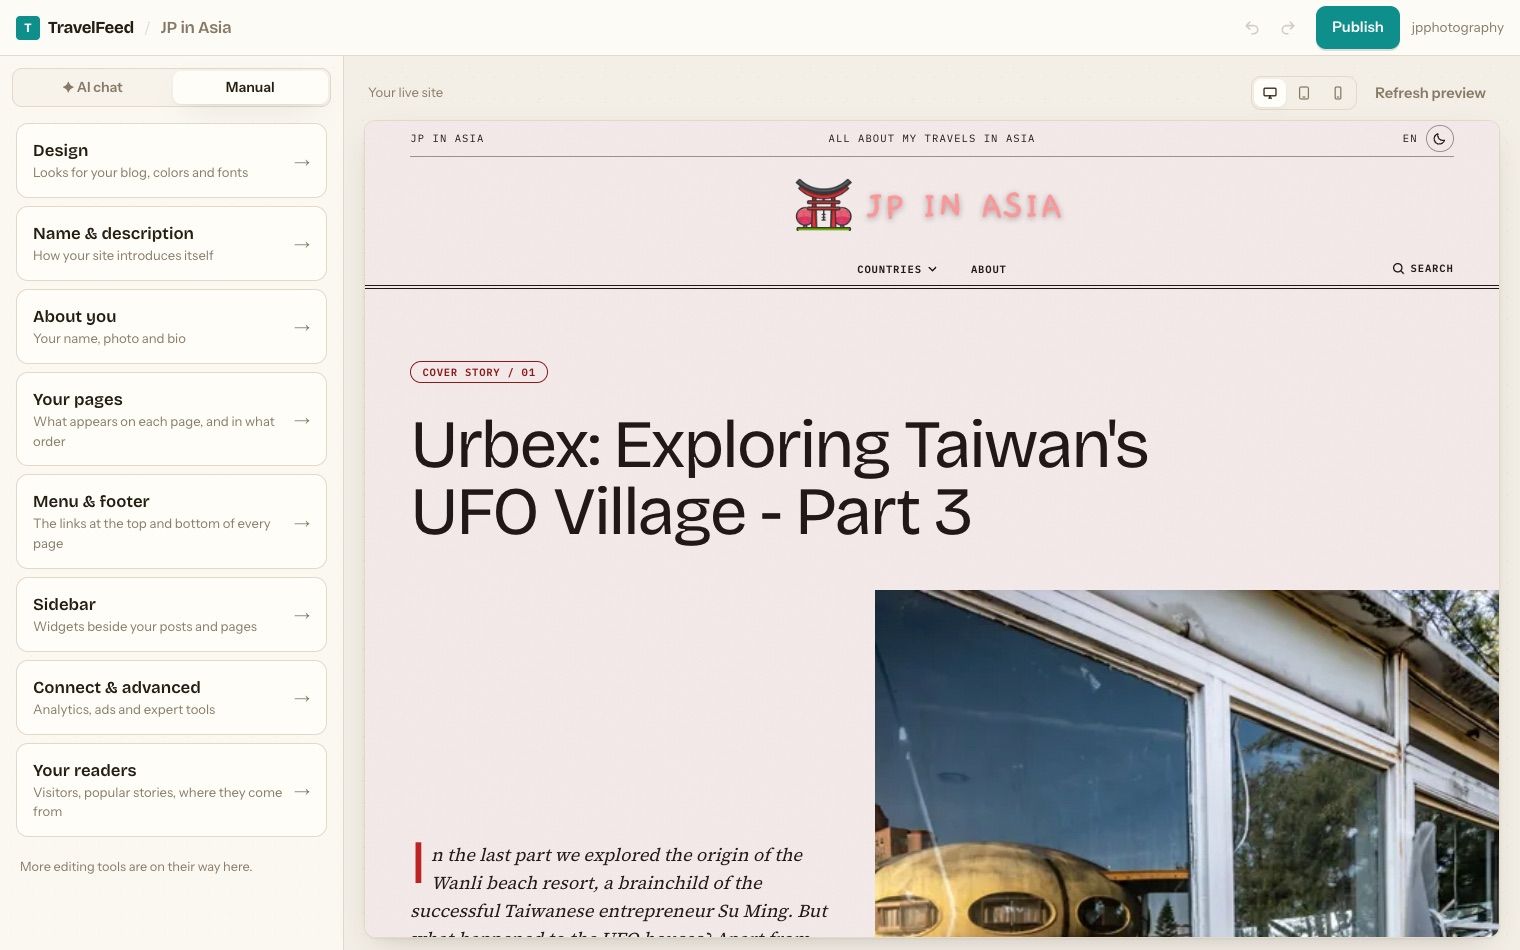
On the left is the list of areas you can edit. On the right is a preview of your blog. The buttons above the preview switch between desktop, tablet and phone size.
Change the design
Design is the first area. At the top, Looks made for your blog shows three designs. Each look is one of the templates, set up for your blog from your photos, places and stories. Click Try this look to see one in the preview. A look keeps your colour and your light or dark setting.
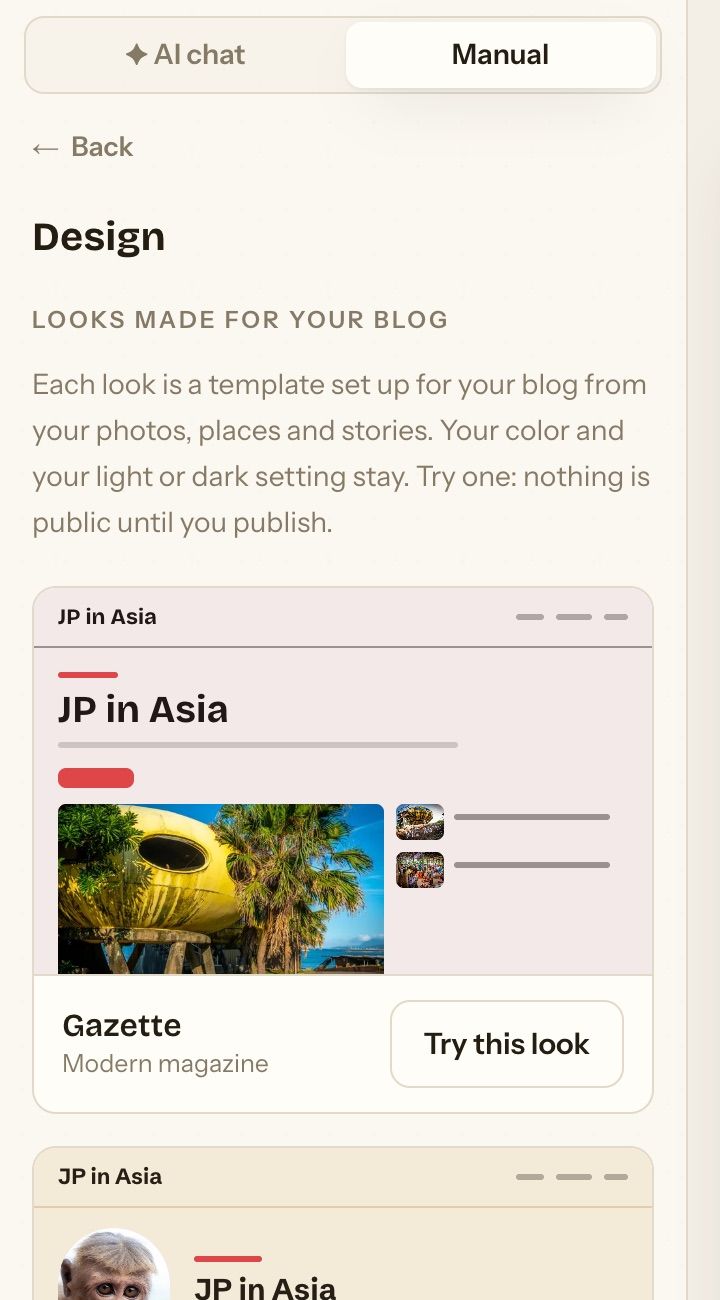
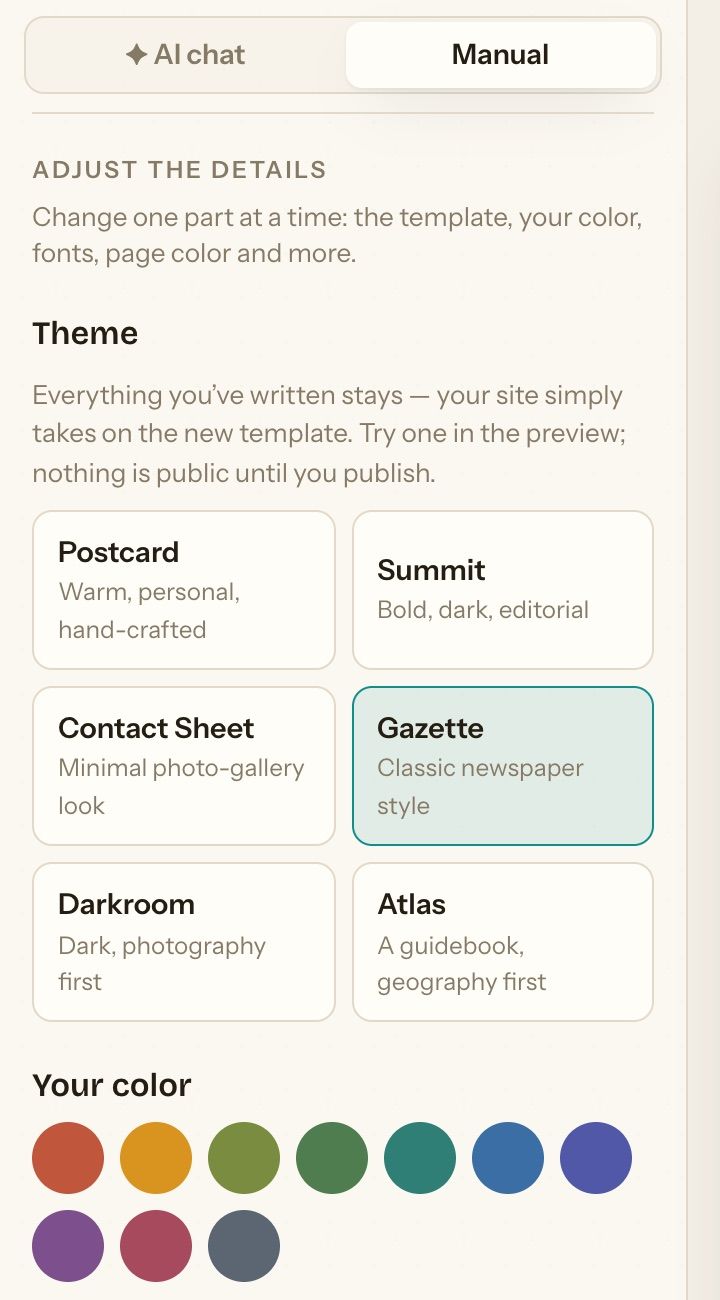
Below the looks, Adjust the details changes one part at a time:
- Template: the template, Postcard, Summit, Contact Sheet, Gazette, Darkroom or Atlas. Your posts and pages stay when you change it. If the new template has no place for some of your sections, the Site Builder names them and asks before it removes them.
- Your color: the main colour of your blog. The template takes its other colours from it.
- Fonts: the font pairings of your template.
- Light or dark?: Always light, Always dark, or Match the visitor's device. Light/dark switch adds a button that visitors can use to change it. Darkroom and Summit are always dark. When you change from one of them to another template, your light or dark setting comes back.
- Your logo, a logo for dark backgrounds, the site icon, and the page colour, contrast, corners, spacing and motion.
Change pages and sections
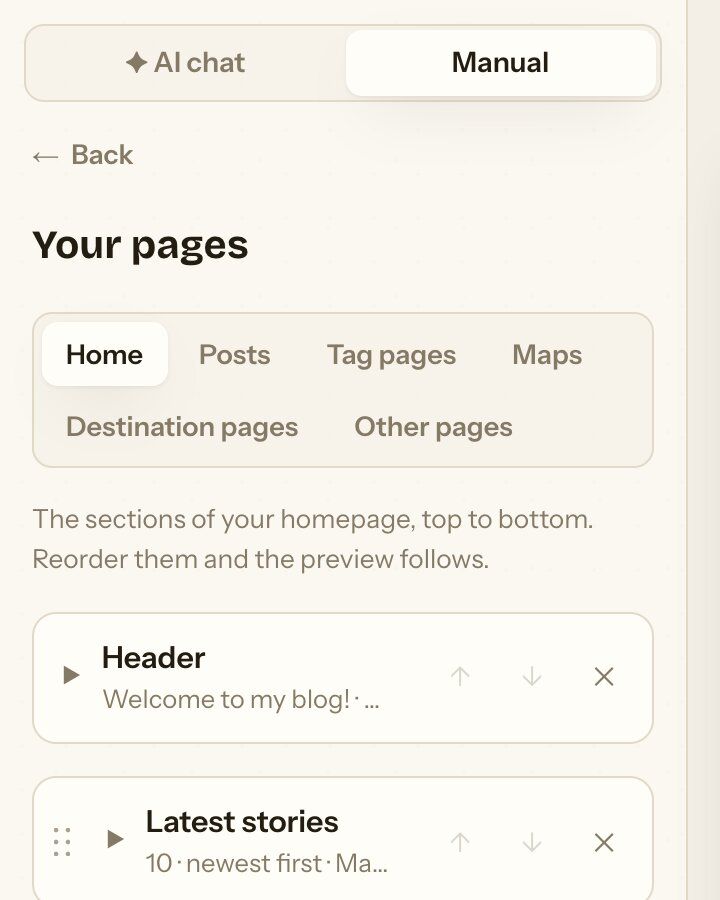
In Your pages, choose a page type at the top: Home, Posts, Topic pages, Maps, Destination pages or Other pages. Each page is a list of sections, from top to bottom.
- Add section adds a section.
- Drag a section, or use the arrows, to move it. The × removes it.
- Click a section to change its text, photos and options.
- To make your own page, for example "About" or "Work with me", choose Other pages, enter a title and click Create page.
Sections that your plan does not include are marked "Hidden on your plan".
Change the menu and footer
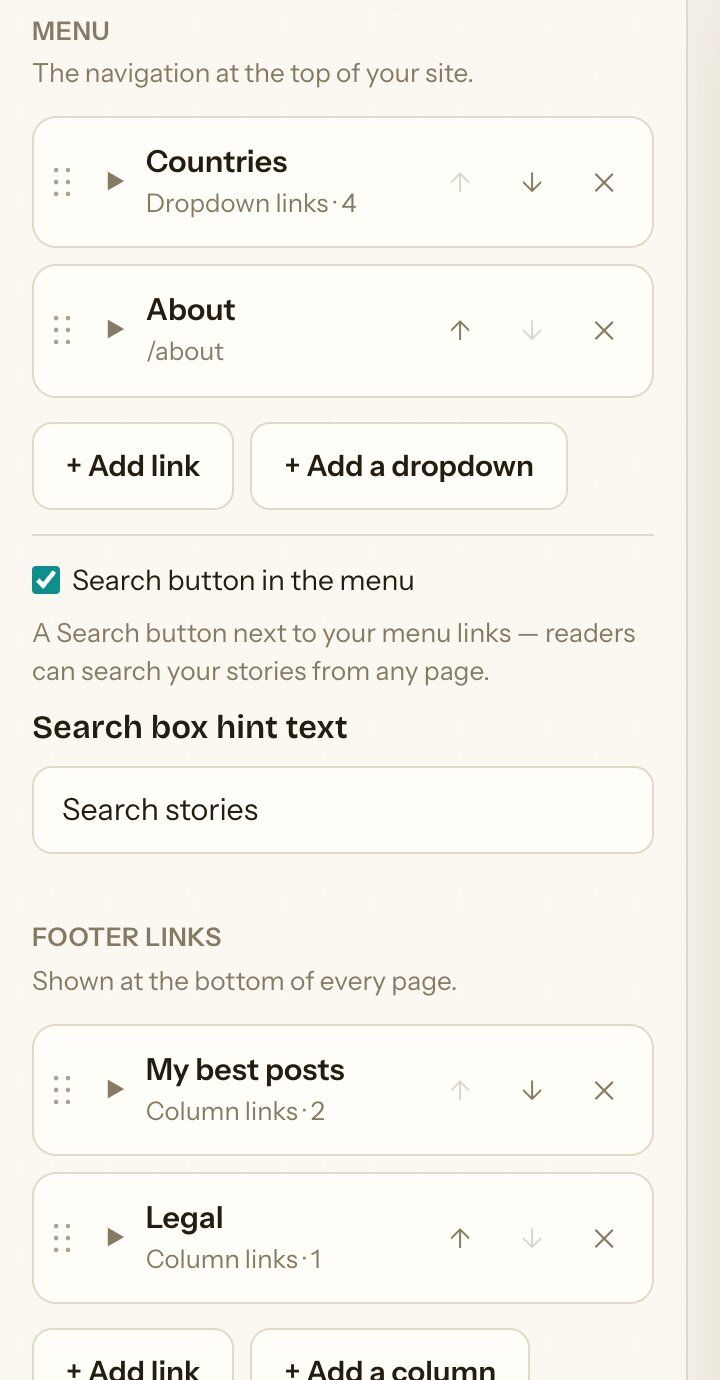
In Menu & footer:
- Add link adds a menu item. Choose where it goes: a page of your blog, a post, a tag, a destination, a section of your homepage or a web address.
- Add a dropdown groups links under one menu item.
- Search button in the menu puts a search button next to your menu. Search is not part of the Basic plan.
- Under Footer links, Add link and Add a column build the footer.
- Social buttons sets the order of your social icons. The links themselves are under About you.
Add a sidebar
In Sidebar, click Add a sidebar, then Add widget: Latest posts, Text & image, Banner, Topic cloud, Archive, Social links, Travel map or Your own code (HTML). Under Show the sidebar on, choose the page types that show it. The sidebar appears on wide screens. On phones the page shows without it.
Comments, contact form and newsletter
These are sections that you add in Your pages:
- Comments (under Posts): the comment thread and a comment form. Visitors without a TravelFeed account confirm their comment by email.
- Contact form: messages go to the email address of your TravelFeed account, or to your own form service. The contact form is not part of the Basic plan.
- Newsletter signup: choose your newsletter service under "Signup service" and enter its form address. The section appears on your blog once the form address is set.
Other areas
- Name & description: the name of your blog and the description that search engines show.
- About you: your name, photo, short bio and social profiles.
- Connect & advanced: Google Analytics, Google AdSense and custom code. See Google Analytics and Google AdSense.
- Your readers: visitor numbers. See Built-In Analytics.
Publish your changes
The Site Builder saves every change ("Saved"), but visitors see changes only after you publish. Undo and Redo step through your changes.
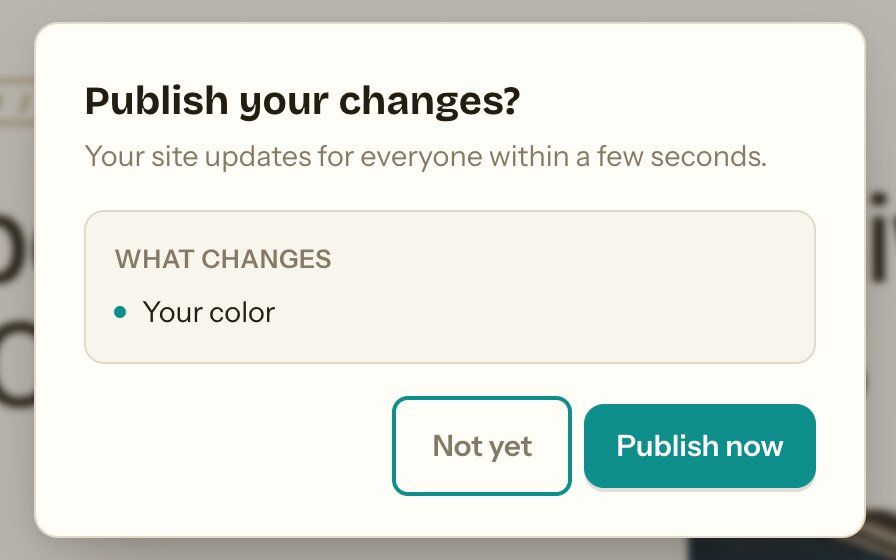
Click Publish, check the list under "What changes" and click Publish now. Your blog updates within a few seconds.
Discard changes removes all changes since your last publish.
Use the AI chat
Click AI chat at the top left and describe a change, for example "Make dark mode the default". The assistant changes your draft. Check the result in the preview and publish as usual. Custom code, styling for the whole site and a change of template are added only after you click Yes, add it.
The chat uses the AI credits of your plan. When they are used up for the month, you can still make every change by hand.